

 |
 |
 |
 |
 |
 Lightfield Iris VIDEO TUTORIALS * GETTING PICTURES * BROWSER & VIEW MODES * USING FILTERS * ADD TEXT & ARTWORK * CHRISTMAS FLOW A-Z |
ONLINE HELP There are 3 main areas. 1. On the left the picture browser. Displaying the pictures of the selected Lytro database. 2. In the middle the currently selected picture. If effects, text, artwork or frames are applied, you will see this here. You can also share or copy the current picture (as you see it here) from here. 3. On the right you get more info about the picture. You can also apply effects, text, artwork and frames, or share the picture 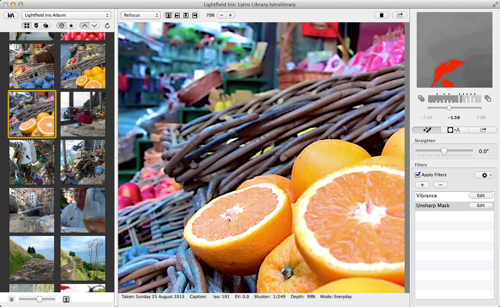 At the top of the picture browser you get the icons shown below.  On the left you have the Library button. This opens the Library window to select another library or add a new one if you use it for the first time. Next to the library icon you have a popup-menu to select an album in the library. The group of icons on the left filter the images as you'd do it in the Lytro Desktop application. From left to right: All - Flagged - Perspective shift. The group with the clock and star icon, shows if the pictures are sorted by time or by rating. The group on the right with the arrow up and down, indicates if the pictures are sorted in ascending or descending order. Completely on the right, you have a refresh button in case you added pictures with the Lytro Desktop application, or if you created a new album in the Lytro Desktop application. The refresh button reloads the data from the Lytro Desktop application. At the bottom of the picture browser you have the icons shown below.  Here you have buttons to increase or decrease the size of the thumbnails in the browser. You can also use the slider. Above the main picture you find the icons shown below.  On the left you can select the View Mode. Next to the View Mode you get the standard rotation icons. Next you get the zoom in and out icons, so you can really see the picture at 100% if you want to. The percentage is shown as well. On the right you have the Pasteboard button, to copy the current image (at the scale factor it is displayed) to the Pasteboard. This can be very handy to import into another application. Completely to the right, you have the Share button to share the picture to Facebook, Flickr, Mail... This is NOT the stack of pictures, but the picture shown in the middle part of the the application. There are 4 possible mode. The "Refocus" and "All-In-Focus" modes are always available. Lightfield Iris will always create an all-in-focus picture. If you created a perspective shift picture in the Lytro Desktop application, 2 additional modes are available. Perspective shift and Cross-eyed 3D view. Depending on the selected view mode, the top right part of the window will display different info as shown below. 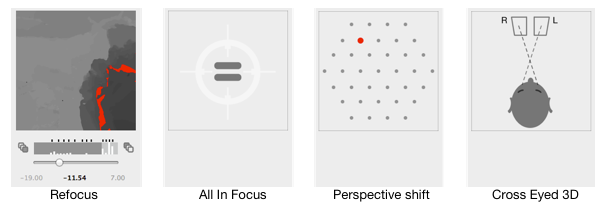 Refocus Mode: on the right, you get some info about the picture This part helps you understand what you are seeing and what is selected. The gray picture is the depthmap of the picture, and shows what is far away and what is close by. The darker the color, the closer to the camera. The lighter the further away. 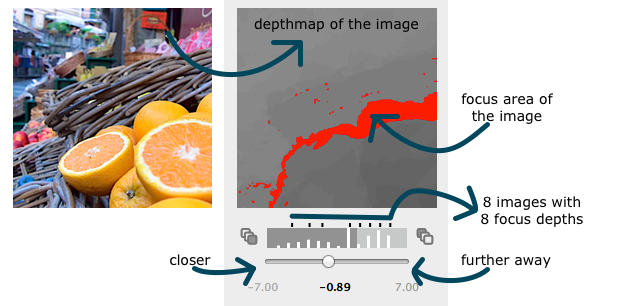 If you click in the main picture (middle), the area of the picture that is in focus will be indicated in red in the picture on the right. Below the picture, you see a histogram (of the depthmap), and the black blocks (here 8), indicate how many refocus pictures are available. This means that Lytro (in this case) has made 8 pictures for you, at 8 different focus points. There can be up to 12 pictures, but in some cases there may only be 4 pictures. It just depends on the picture. You can click on the main picture to refocus the picture, or you can use the slider to change the focus, and therefore the refocus picture. All in Focus Mode: on the right you see an equal sign (=) This mode shows the sharpest possible picture. Lightfield Iris will always create an All in Focus picture for you. Perspective shift view: on the right you see 37 dots In this mode, everything is always in focus, but the picture can be viewed from 37 different angles. The red dot shows the angle is being displayed. Cross Eyed 3D view: on the right you see a person trying to ... This mode displays 2 images next to each other. The pictures that are shown here, are the most left and most right pictures form the perspective shift view. That's also why this view is only available if the perspective shift pictures exist. The bottom part on the right allows you to select between 3 panels (see below).  On the left: Filters. In the middle: Frames, text and artwork. On the right: Upload and Share. Filters 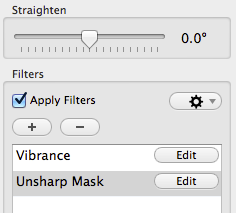 We've put a straighten slider in the window because we think people will use this often. You can apply a whole range of effects on the picture, and can be very creative with this. The best thing of all, is that you can combine all these effect, in any way you want. Basic filters like contract and highlights controls are available. But also highlight and shadow corrections, or gamma, exposure... Unsharp mask is another much used effect to get a little sharpen image. Or vibrance to make the image a little more sunny. Or the old Sepia effect. But also Gloom and Bloom effect, monochrome, white point, ... Have a look at our gallery to have an idea what you can do. Click on the "+" icon to add an effect and on "Edit" to change the settings of an effect. The order in with the effects are listed is not important. If you really like a combination of filters and filter settings, you can save it in a preset to reuse later. Frames, text and artwork Here you don't do color corrections but you will change the content of the picture. 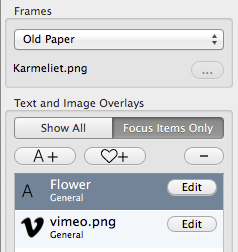 The first way to modify a picture, is by adding a frame. The default setting is "No Frame", because the picture doesn't need one... But Lightfield Iris also provides a number of frames which you can select in the popup. There are some vintage effects in there which are very nice. You can also use a custom frame, which allows you to select an image for a frame. The frame is added on top of the picture, so you have to use an image that has transparency. You can make some nice creative effects with it. You can see the effect in the main window. The custom image is always (if needed disproportionally) resized to the max size (1080 x 1080 pixels). A second way to modify the content is by adding "text" and "artwork" to the picture. You could say it's a bit like using a simple drawing program. Just like with the effects, you can add and delete text and artwork objects. Use the "Edit" button to change the font, color, opacity, size, positioning on the picture...etc. Important to know is the different behavior in function of the View Mode. As explained above, only the Refocus mode displays a different "focus" picture in function of what you clicked on. All objects (text, artwork) will show "general" below the text or artwork object (as you see above). In the case of the refocus mode, the text and artwork is added to the refocus picture that is selected when you add the text or artwork. This allows you to add for example text to a picture with focus 5.2, and another text for the picture with focus -3.7. While you refocus the picture, the text will disappear and the other text can appear in function of what you focus on... Upload and Share 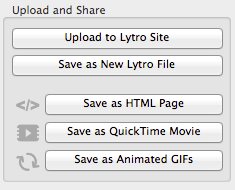 Upload to the Lytro Site 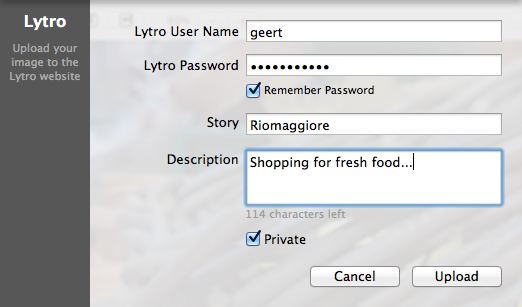 Here you fill in your Lytro name and password. If you don't know it, go to the Lytro site and log-in. Some items are required for the upload. Disclaimer: Lytro doesn't provide a public interface for uploading files to the Lytro Gallery. We noticed that this doesn't always work. If it doesn't work (you'll get an error), simply save a new Lytro file (see below) and upload it with the Lytro software. Save as New Lytro (.lfp) file This will create a new .lfp file. You can import this file into the Lytro Desktop application by going to "File > Import from Folder...". You can upload the file to the Lytro site, and everything will be fine. Save as HTML 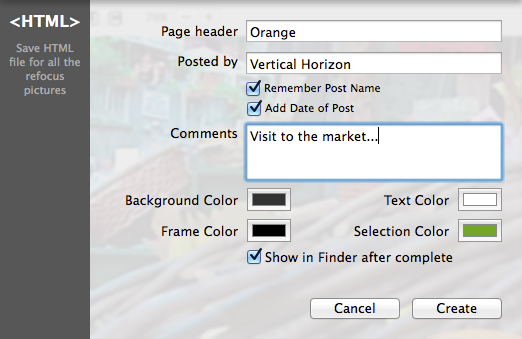 Lightfield Iris will create a HTML page for you, that let's you refocus the image, without sharing it in the Lytro gallery. If you know a little bit about HTML or making websites, this HTML-export will allow you to integrate your lightfield images on your site without sharing them anywhere else. The images shown in our Gallery under HTML are made in this way... Have a look. Remark: When exporting the HTML page, please save the file in a folder under the Pictures folder (User>Pictures). If you don't do this, only the html-page will be saved. Save as GIF 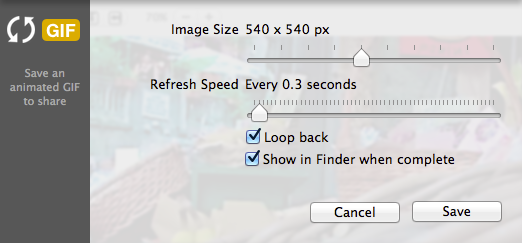 Here you specify the size of the GIF image, and which refresh speed to use. So if I have 8 images, and the refresh speed is set to 1 second, the GIF animation will take 8 seconds. The animation starts with the focus on items that are close by and ends with the focus on items far away. Select Loop back to loop back to the begin situation (from focus far away to close by). This makes it a more fluent animation, but also doubles the animation time and the file size. A GIF file can become relatively big for a not too high quality, but it's easy to use. Select it in the Finder is you want to. Save as QuickTime Movie 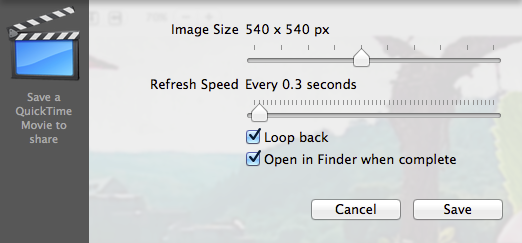 Here you specify the size of the movie, and which refresh speed to use. So if I have 8 images, and the refresh speed is set to 1 second, the movie will take 8 seconds. Like with GIFs, you can also use loop back,to got from close to far away and back... The image quality of the movies is in general better than that of GIFs. Open it when completed, if you want to. Printing is as you'd expect. Use Page Setup... to set the scale factor for the image, and use Print to print the current image. As this is standard printing, you can save to PDF ... |
|
COPYRIGHT © 2013-2014 - VERTICAL HORIZON. ALL RIGHTS RESERVED. |